Crafts for Kids
Great crafts that you can make at home using material from around the house. If you are inspired to make something by the crafts blow then we would love to see your creations. Send us a picture on our Facebook page or email to navanlib@meathcoco.ie or Upload your picture on our Gallery Page
Science Week Ocean Themed Craft
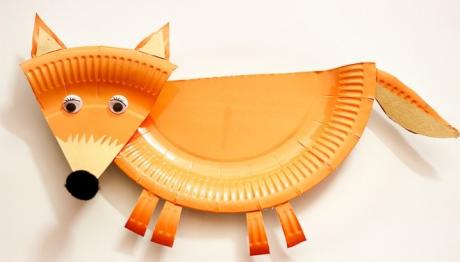
You will need scissors, Pritt stick, orange crayons/markers/paint, googly eyes (optional)
- Colour/paint the plate orange
- Cut the plate in half. Use one half to make the body of the fox and use the other half to cut out the head, tail etc.
- Cut out a triangle shape for the head
- Cut the tail, ears and legs as in the picture
- Use the pritt stick to attach head, legs, tail and ears
- Draw in the eyes and nose or stick on googly eyes if you have them.
Please send us in pictures of your finished fox to show us how crafty you are!!
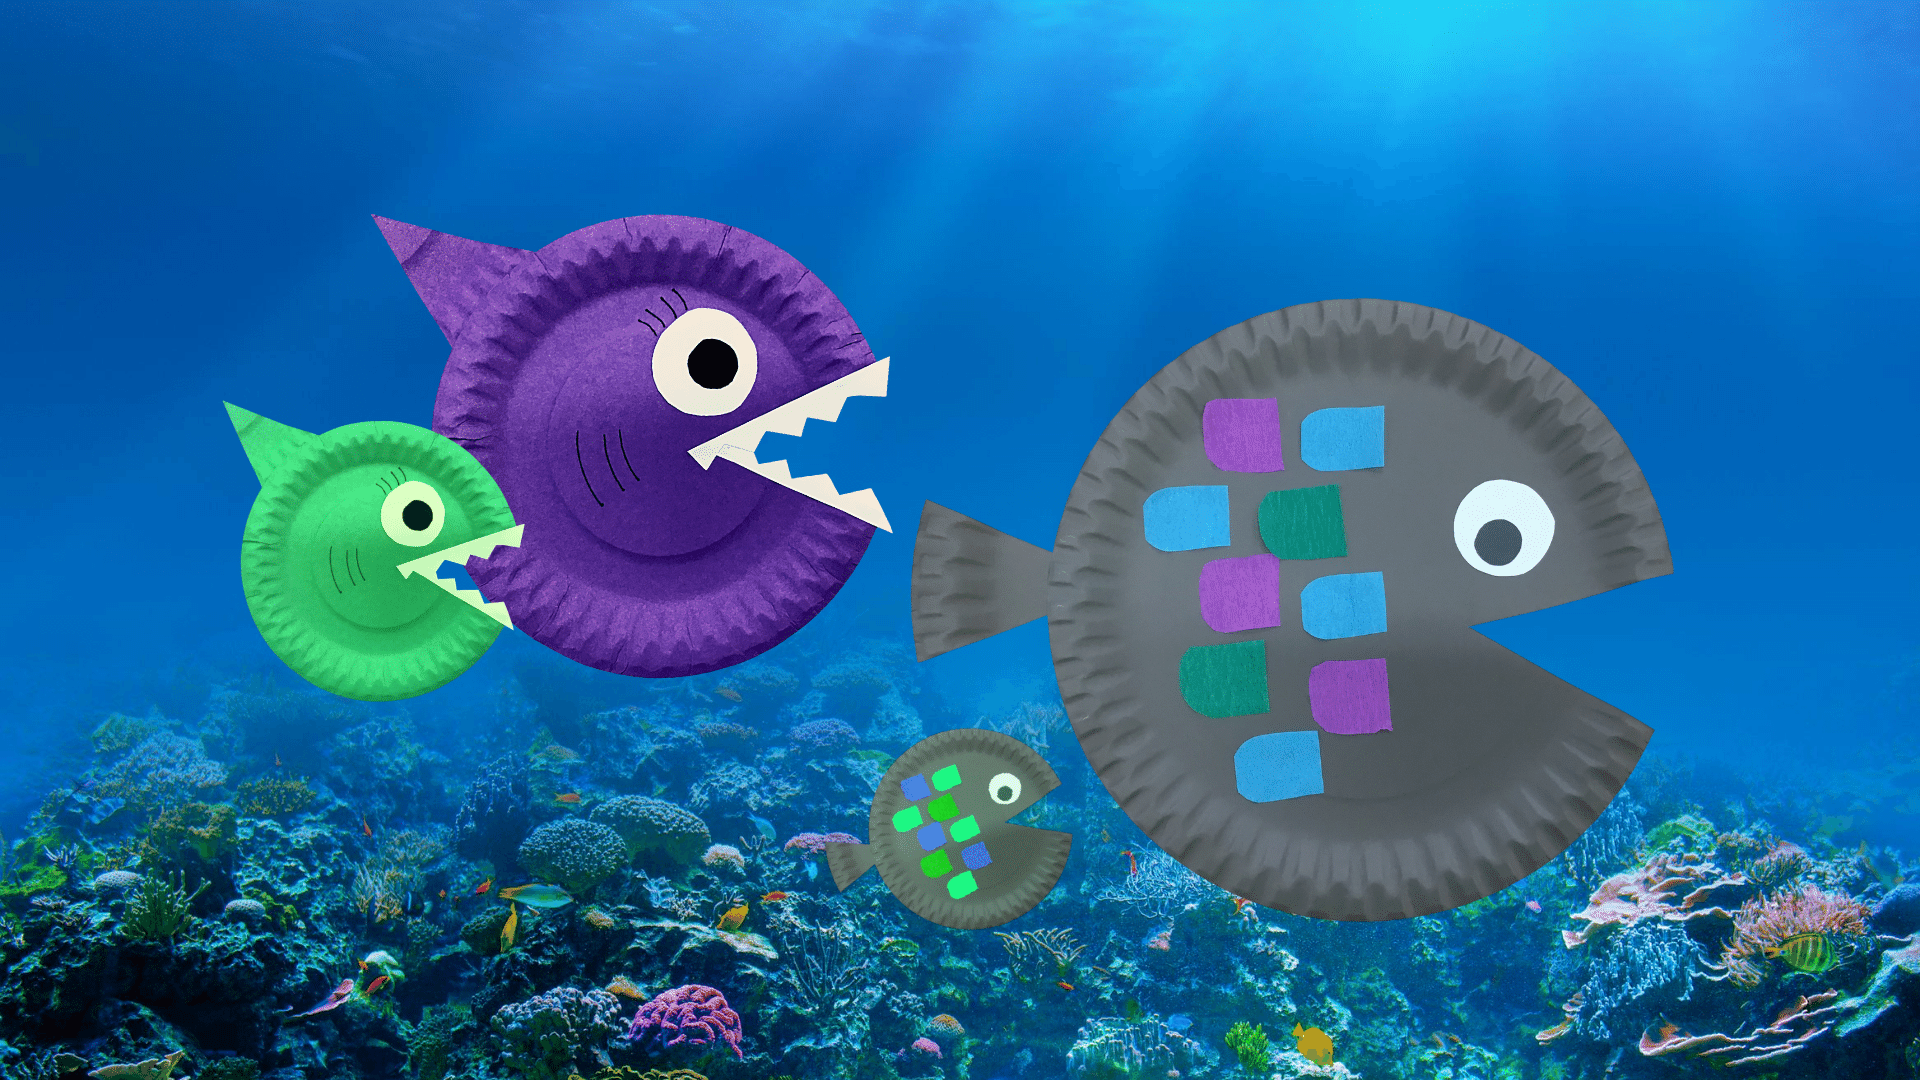
Paper Plate Fish
You will need:
A coloured paper plate (or a white paper plate that you can paint to suit your taste)
Glue stick or PVA
Tissue paper for the scales
White paper to make teeth if you wish.
Any other decorations you would like to put on your fish, glitter, paint, coloured pencils, markers etc.
Step 1: Cut out a triangular piece from the paper plate to make a mouth.
Step 2: Attach the piece that was cut out to make a tail (or a fin). You can use glue or tape to secure it.
Step 3: Then add the fish eye and scales, maybe even teeth! Or any other decorations you would like.
Step 4: Send us some pictures of your finished art. You can email a photo to: navanlib@meathcoco.ie or upload a picture on our Summer Stars Gallery page.
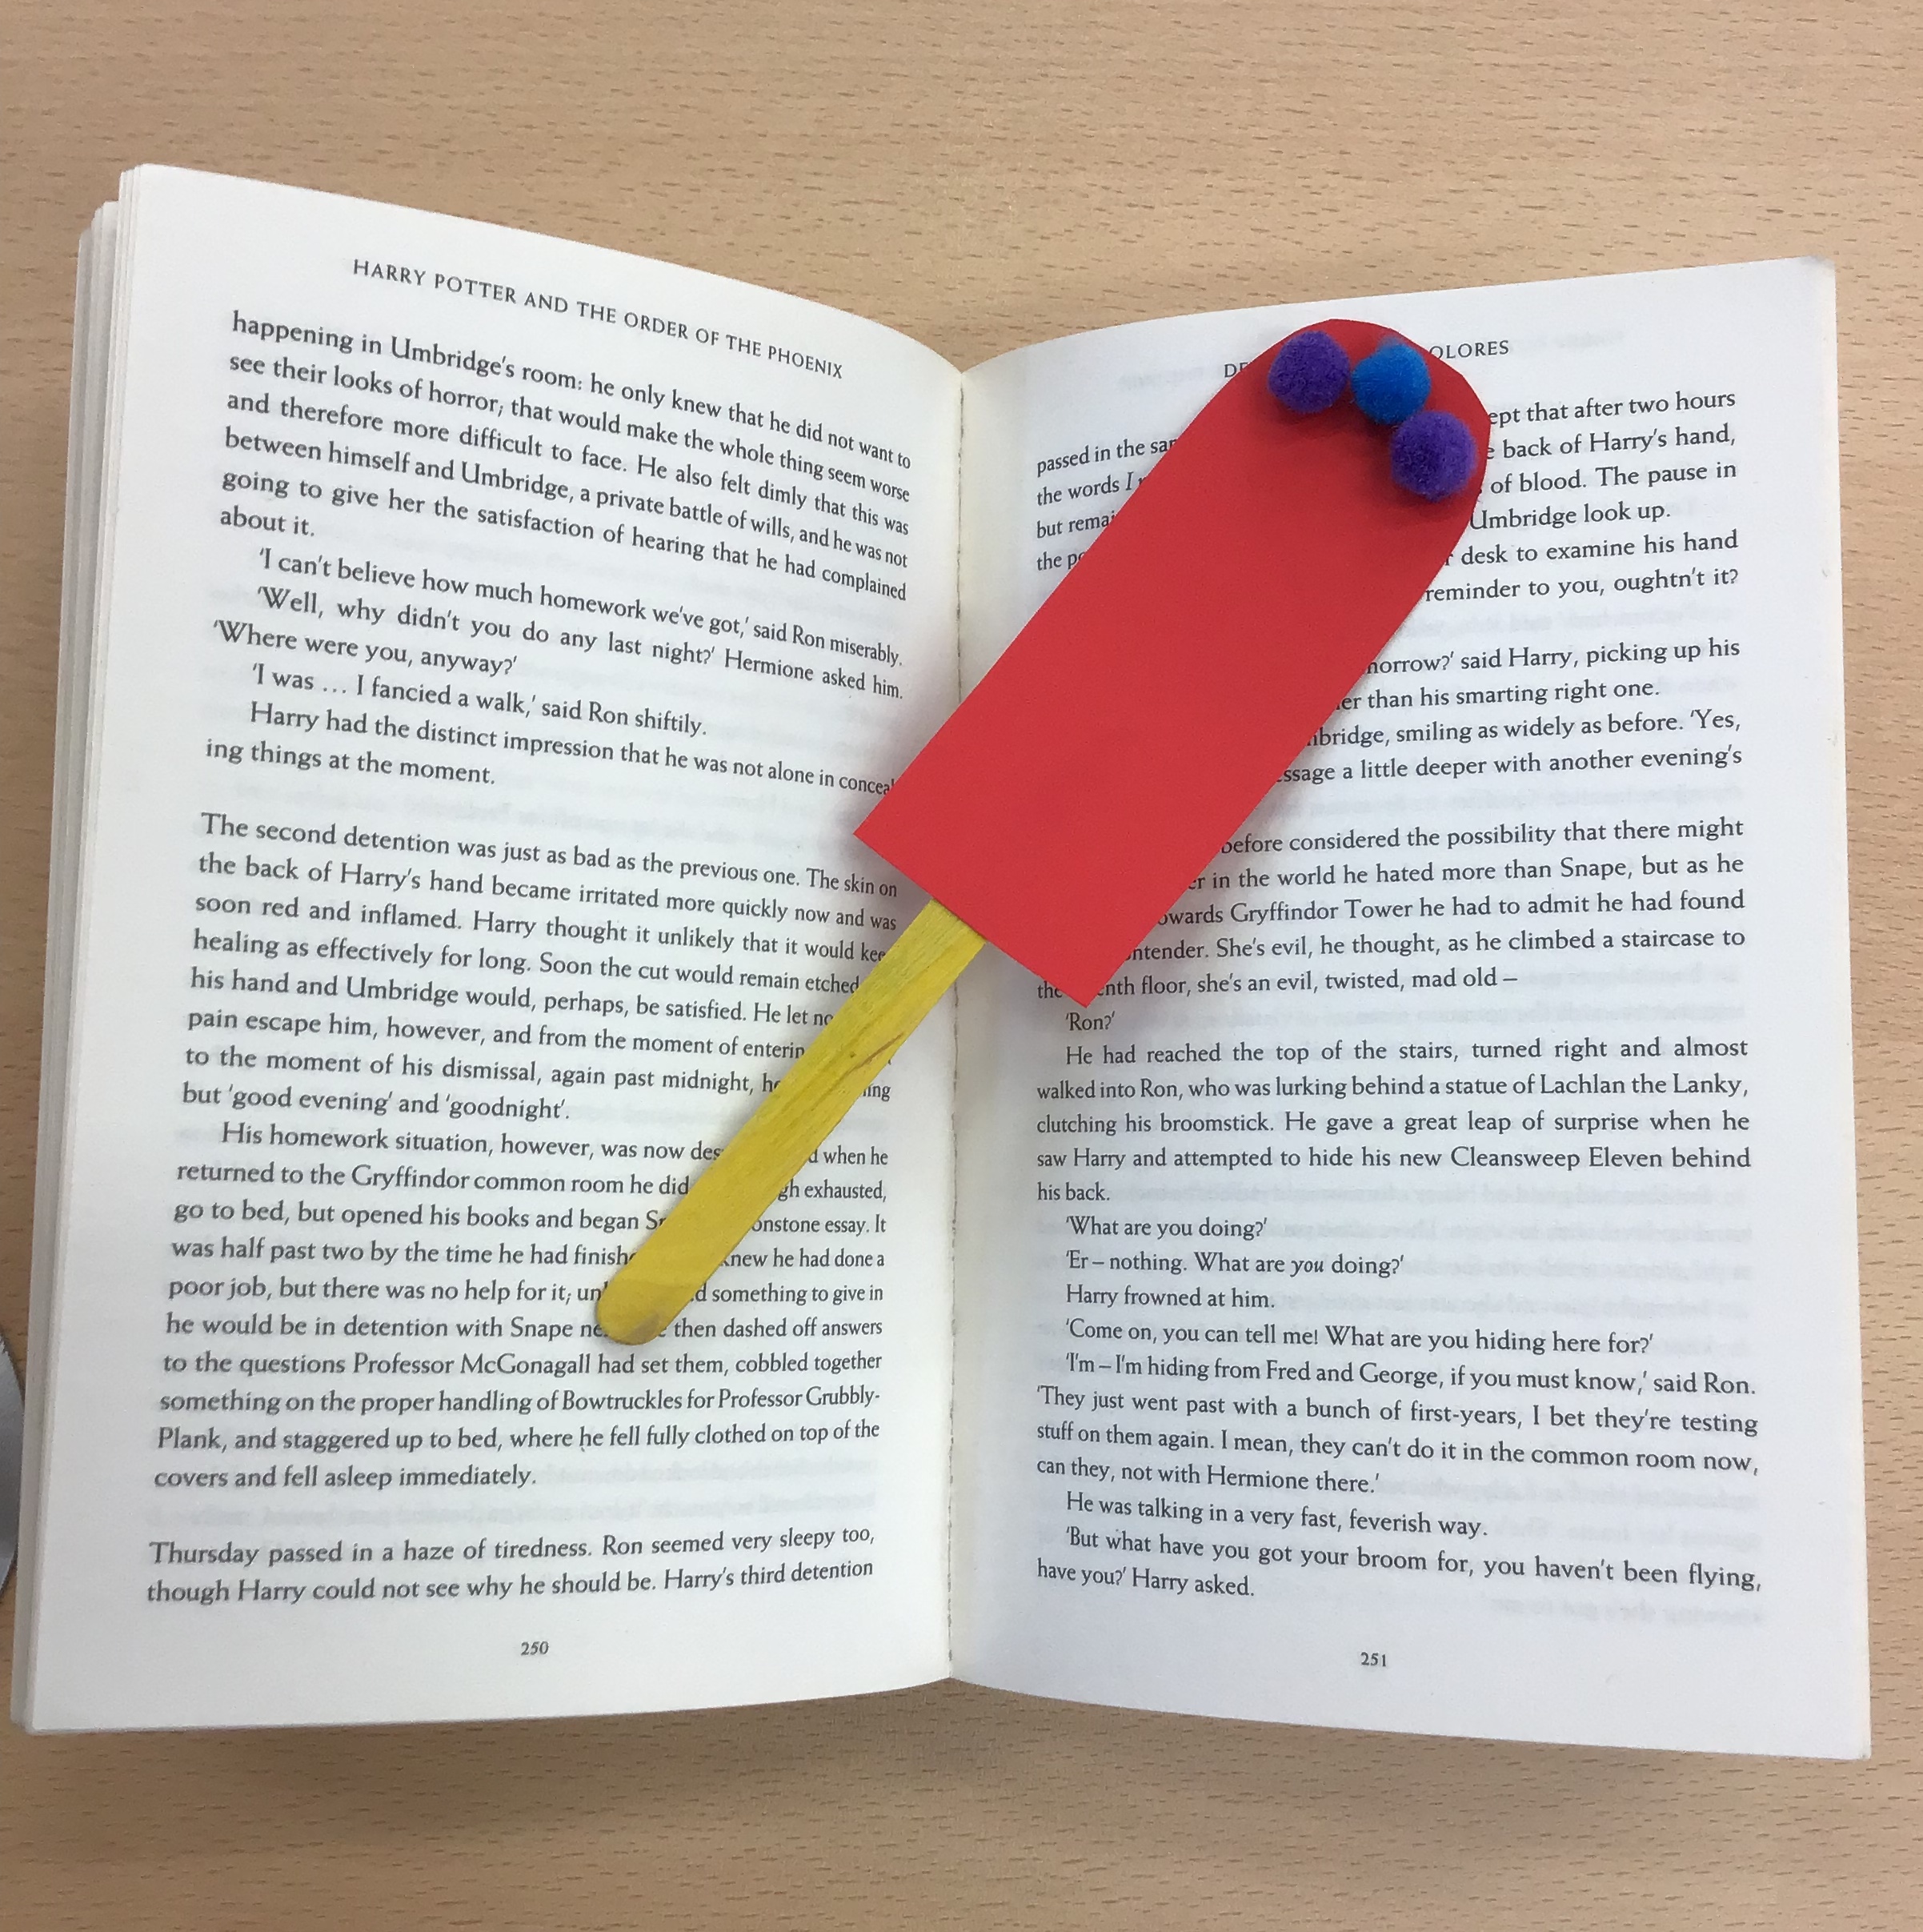
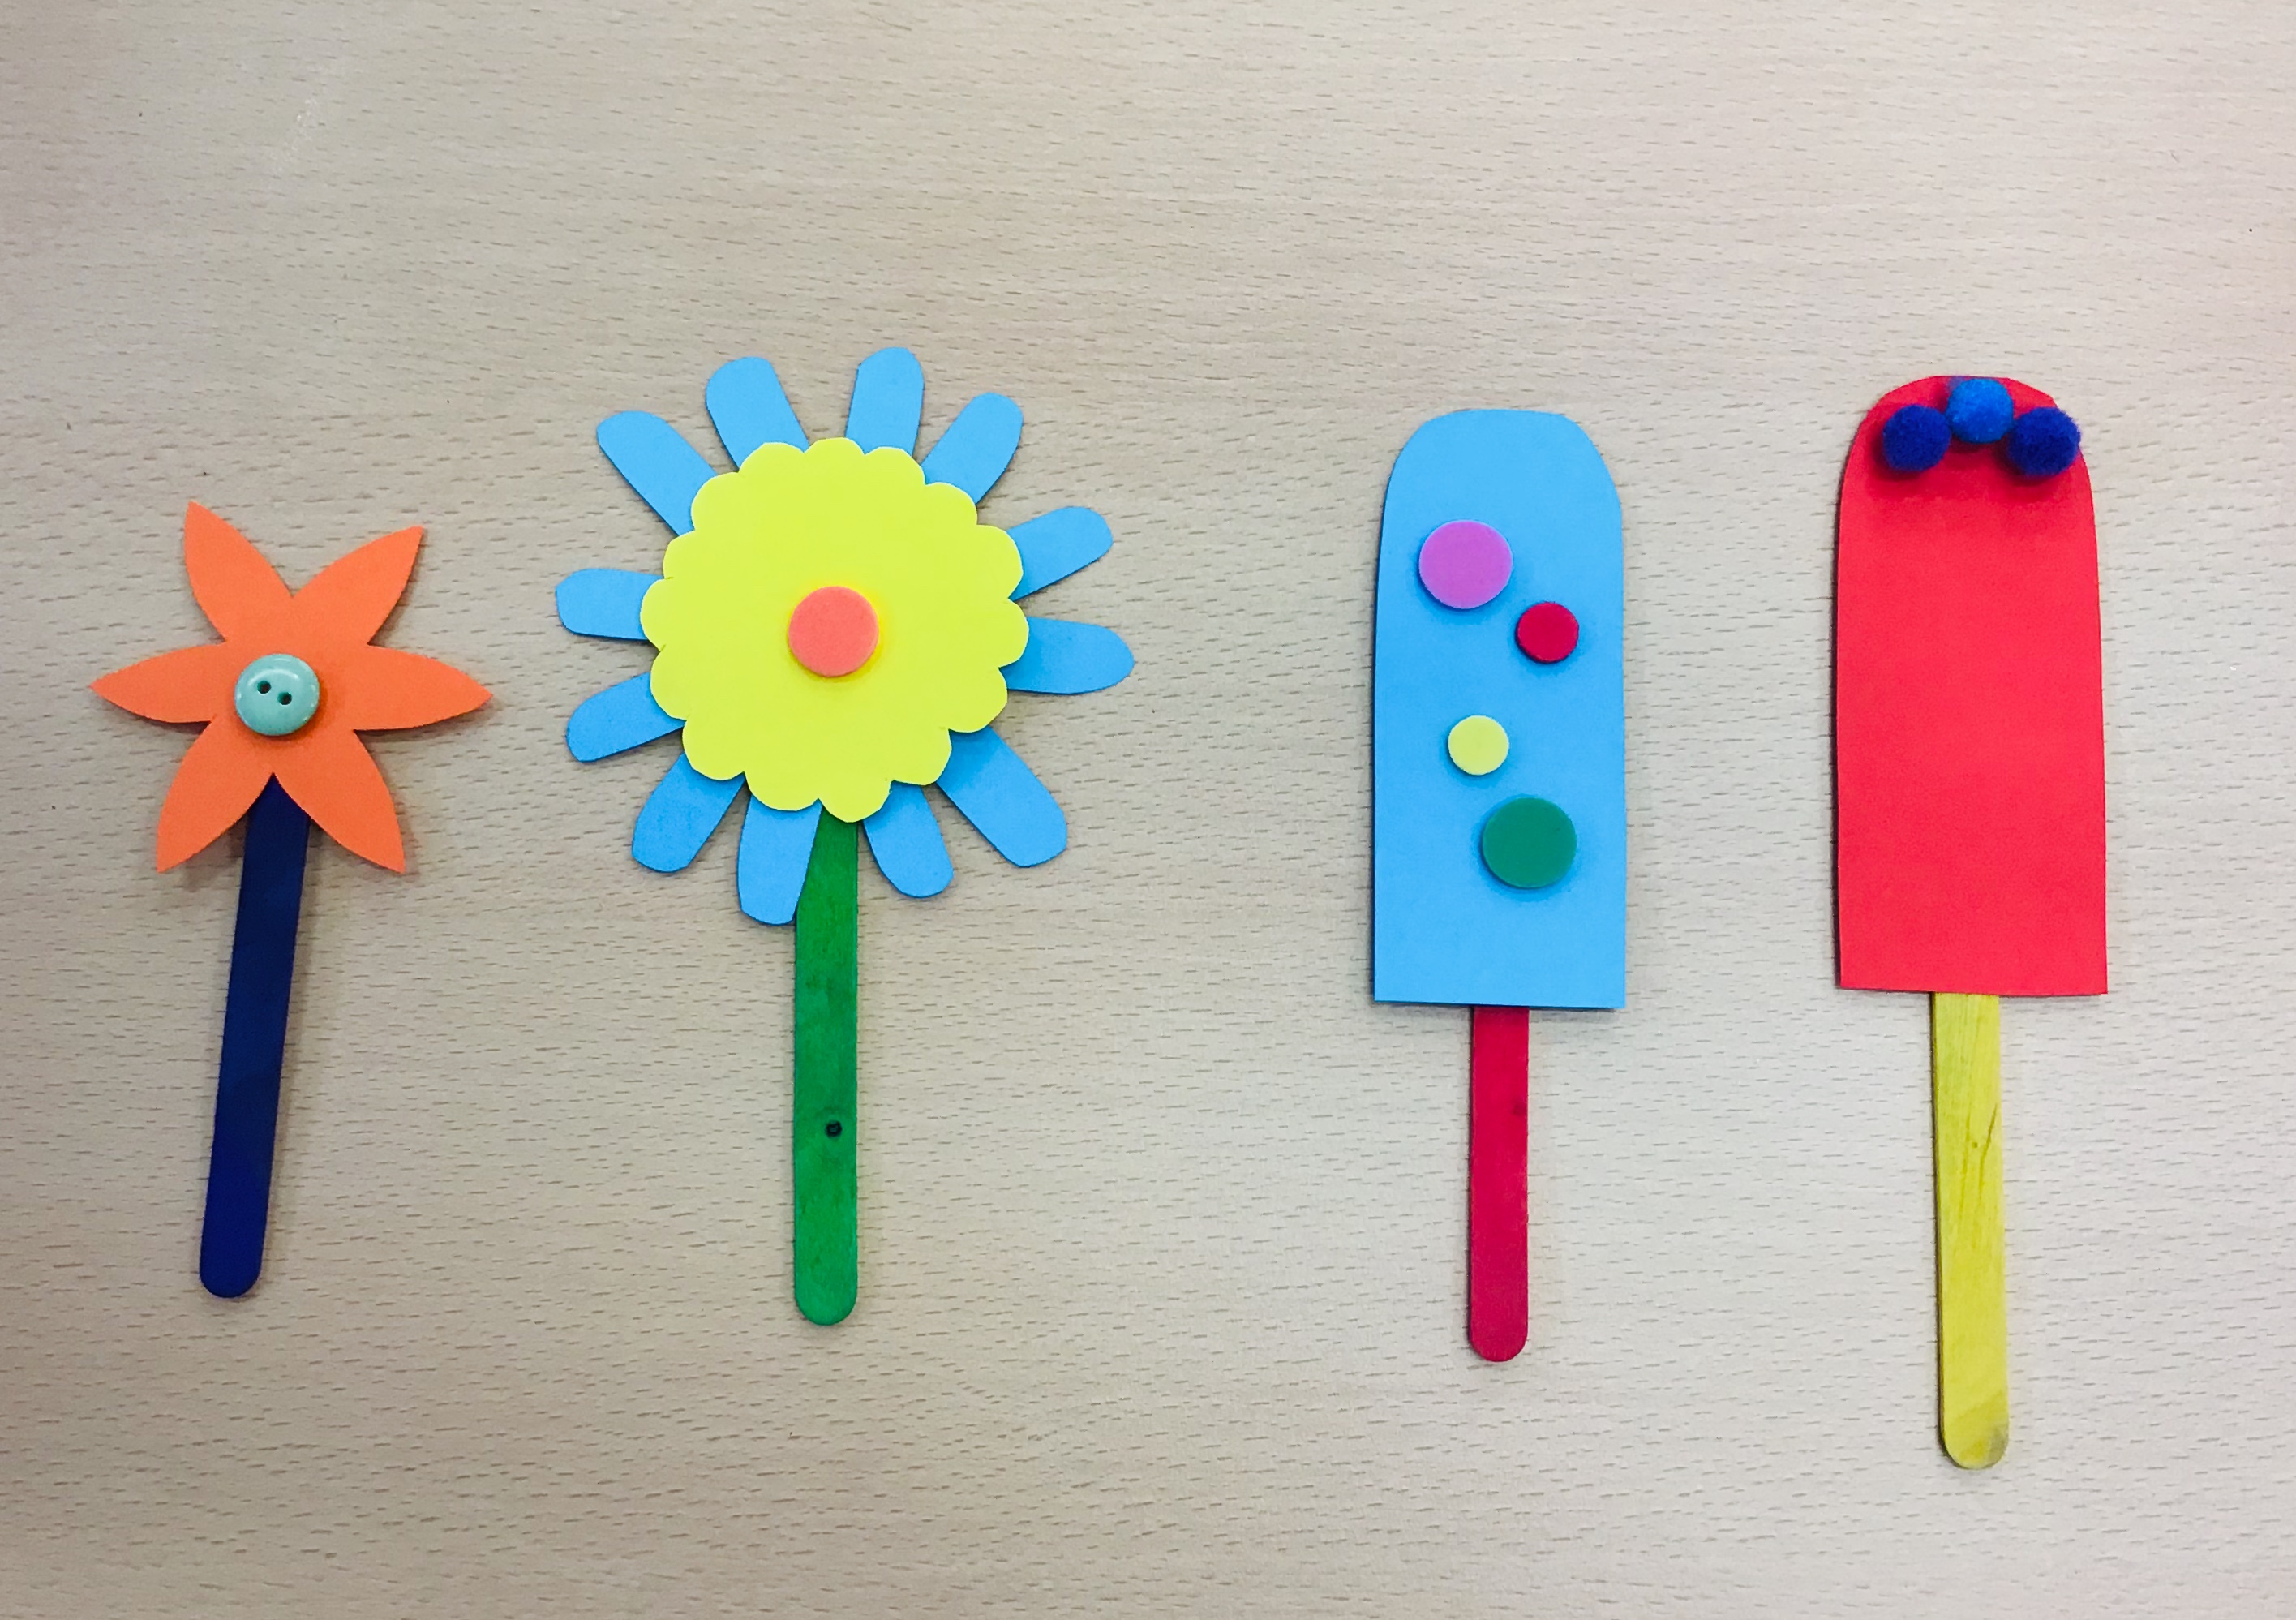
Summertime Flower and Ice Pop Bookmarks
These colourful bookmarks are really easy to make. Just follow the steps below and remember to send us pictures of your finished bookmark.
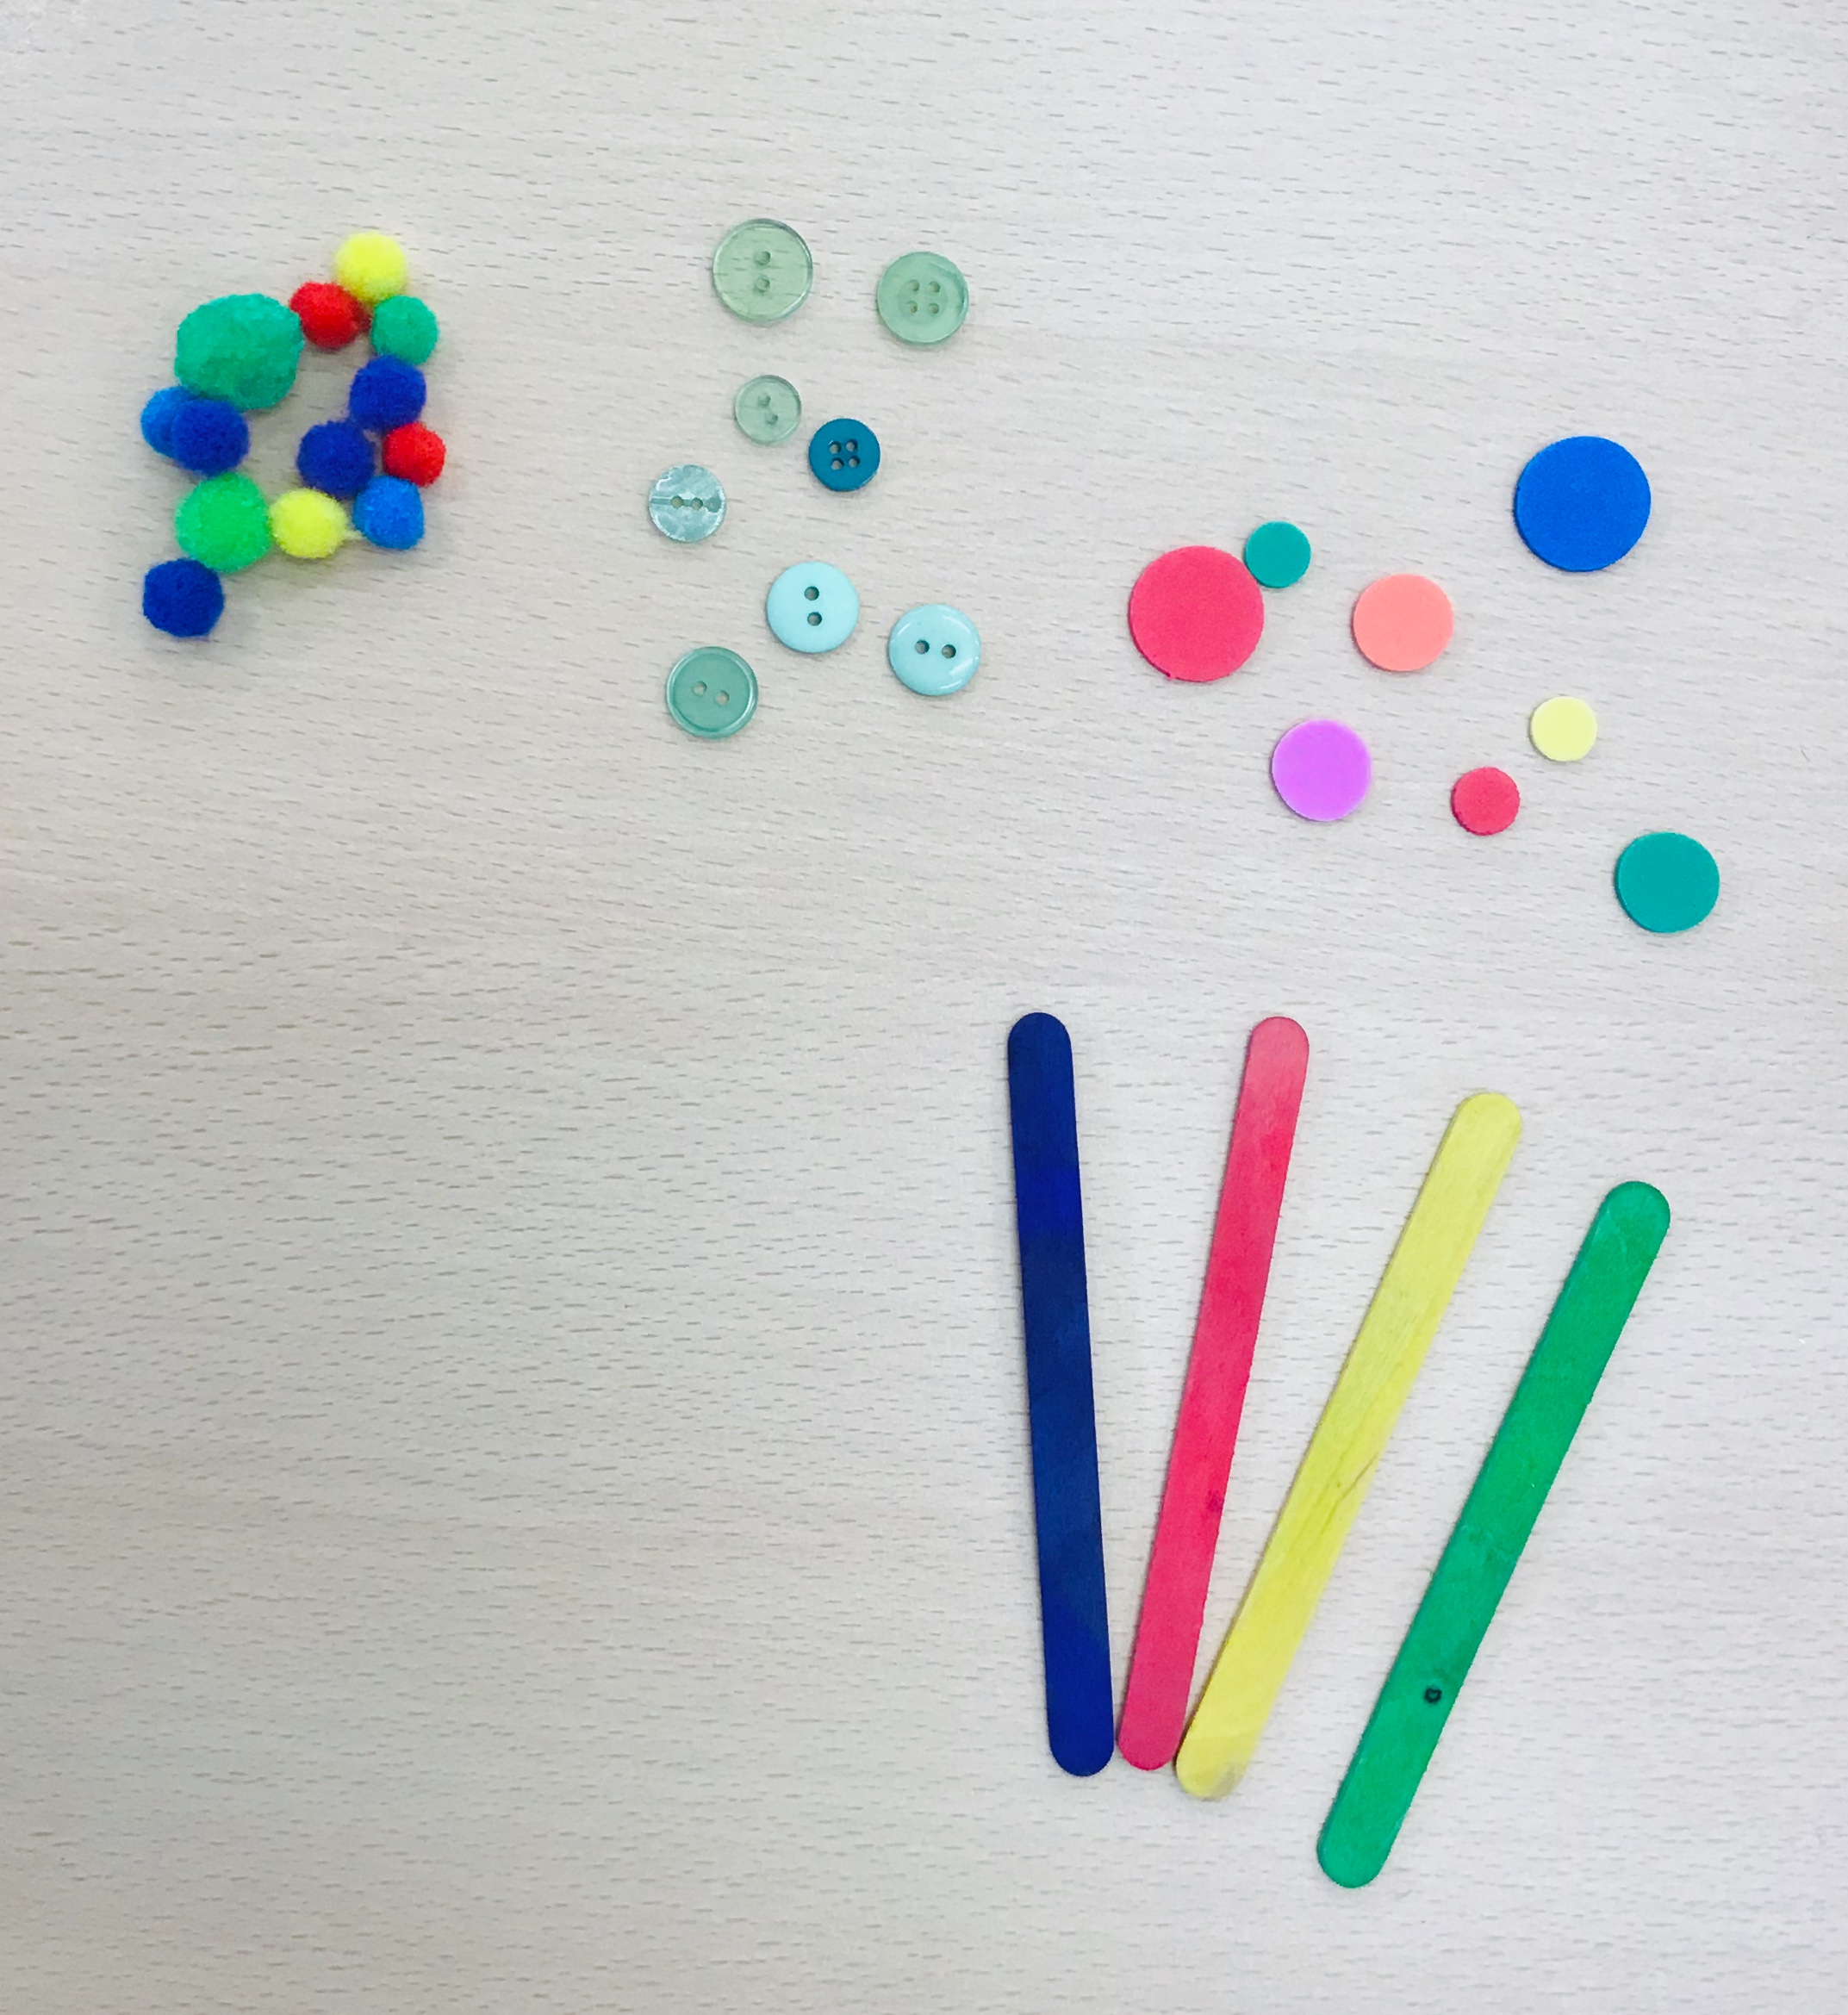
 You will need
Coloured card
Buttons, pom poms and foam dots for decoration
PVA glue
And your imagination!
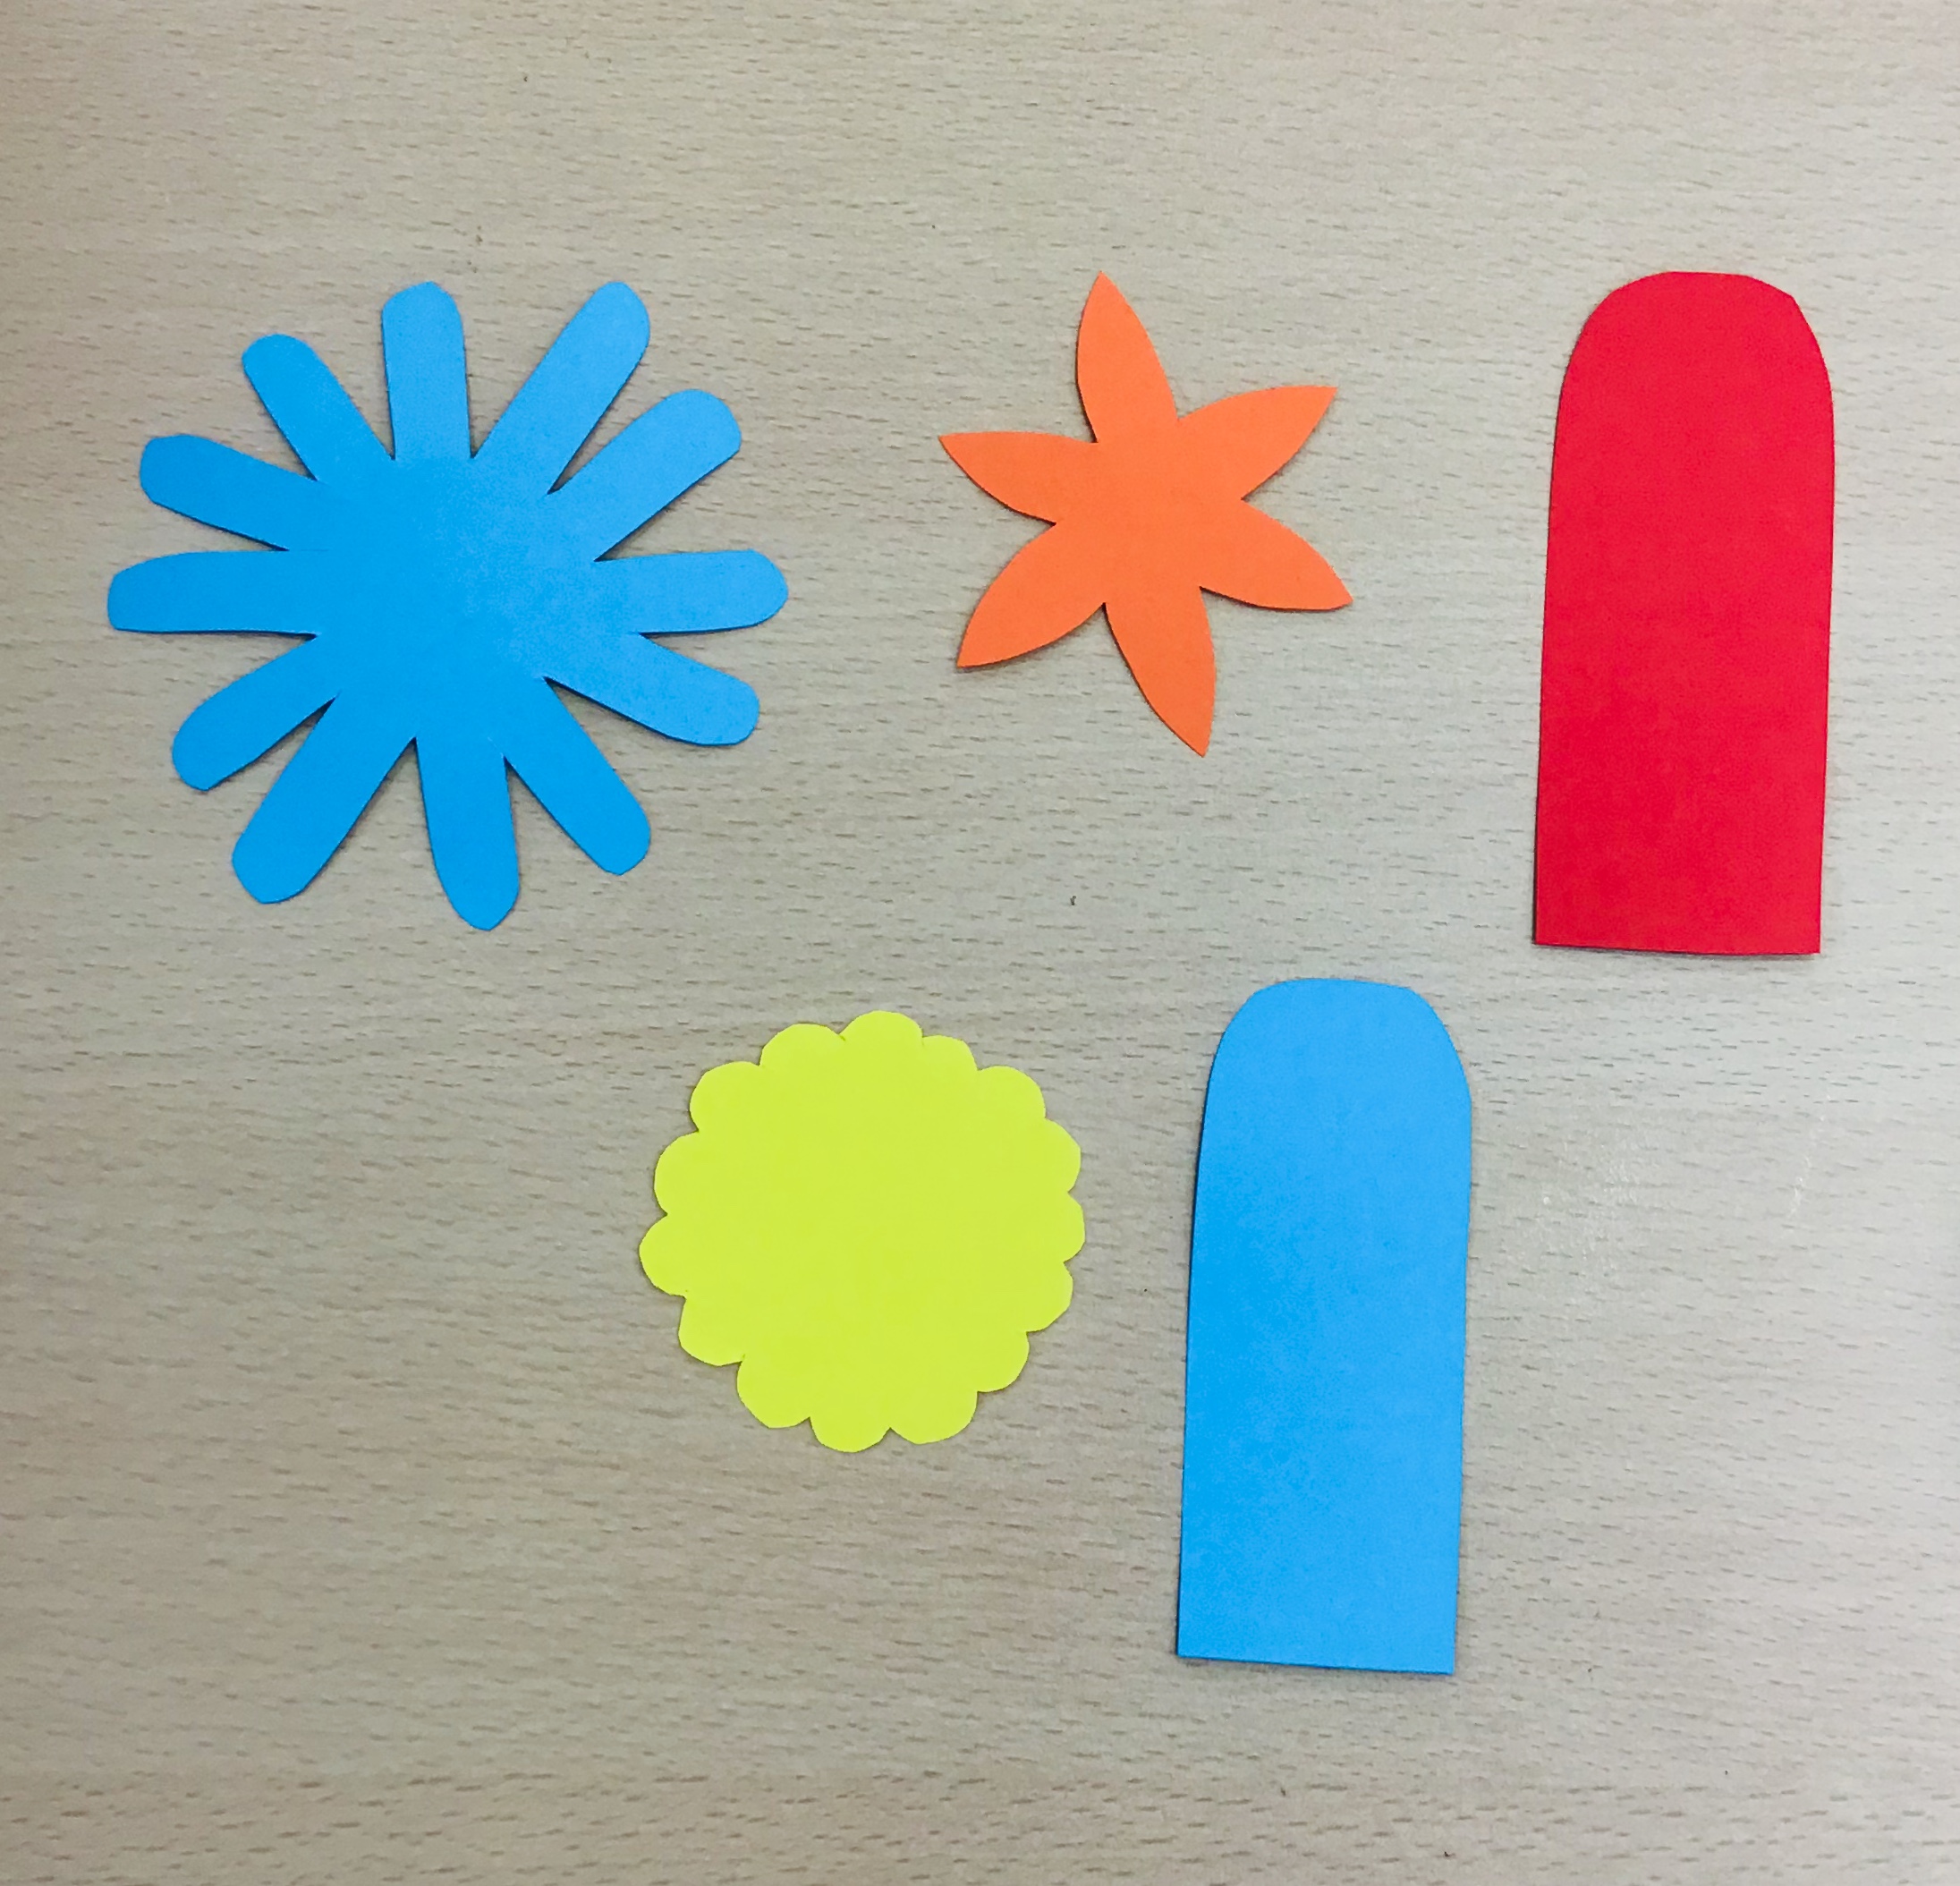
Step 1 : Cut the coloured card into a flower or ice pop shape.
Step 2: Stick your shape on to the ice pop stick using the PVA glue.
Step 3: Decorate with the buttons, pom poms and foam dots.
Step 4: Use your new bookmark to mark your favourite Summer reads!
Paper Plate Hot Air Balloon
This is an easy colourful craft to do. If you don't have paper plates you could always cut out circles of cardboard from old cereal boxes.
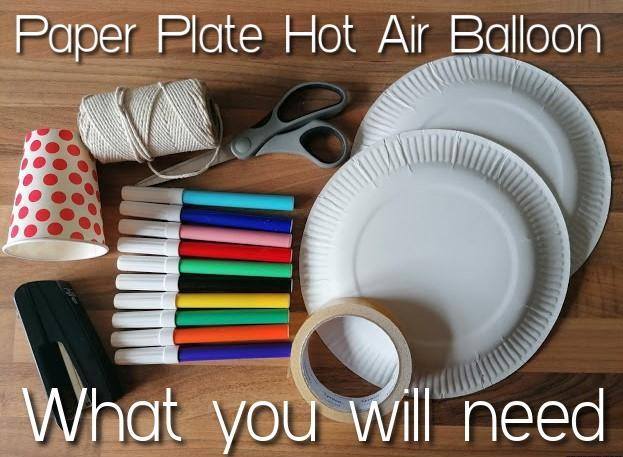 You will need:
2 papers plates, paper cup, markers/colouring pencils/crayons, tape, string/cord, scissors/hole punch, stapler.
What to do:
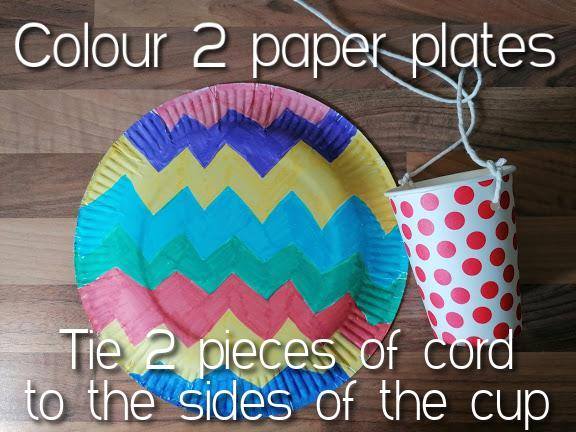
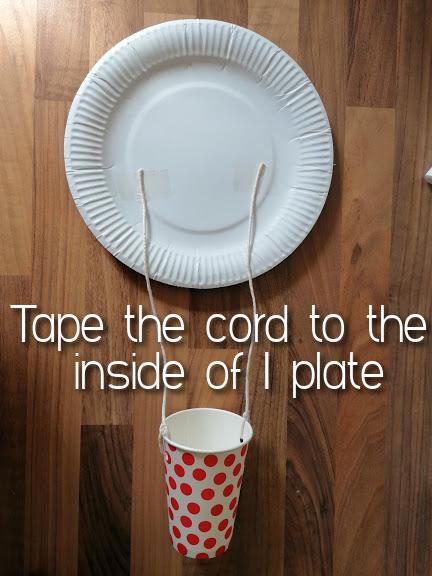
Step 1 : Colour the 2 paper plates and tie 2 pieces of cord to the sides of the cup
Step 2: Tape the cord to the inside of one of the plates
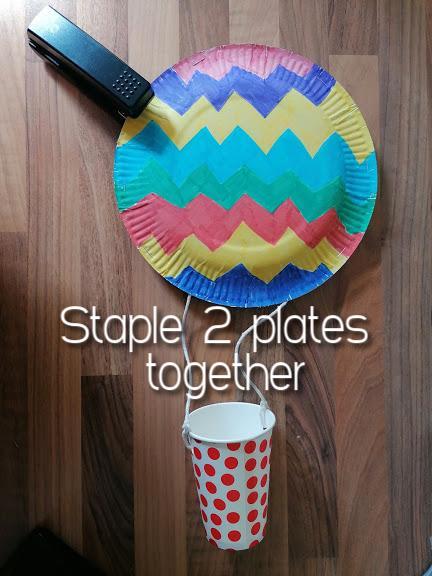
Step 3. Staple the 2 plates together to finish off the balloon.
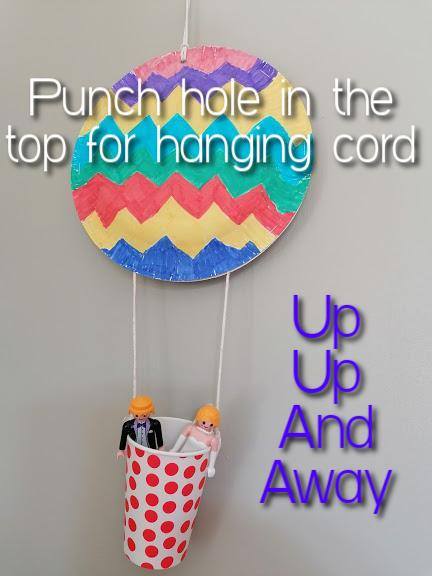
Step 4: Punch a hole in the top of the balloon so you can hang it up with some cord.
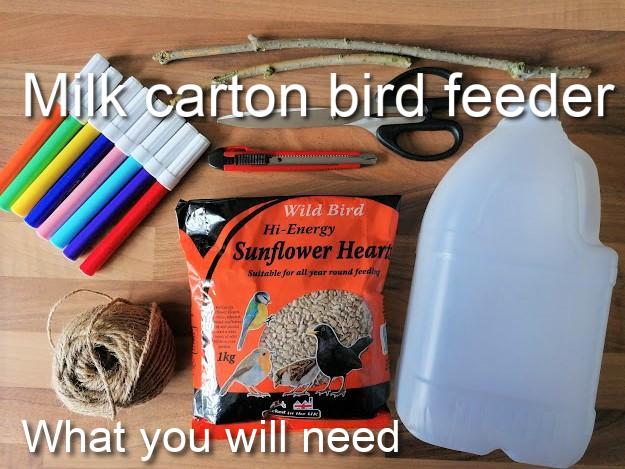
Milk Carton Bird Feeder
These bird feeders are easy to make but also very functional to help out our feathered friends.
 You will need
- an empty milk carton
- markers
- string
- scissors
- some twigs/small branches
- bird seed
What to do
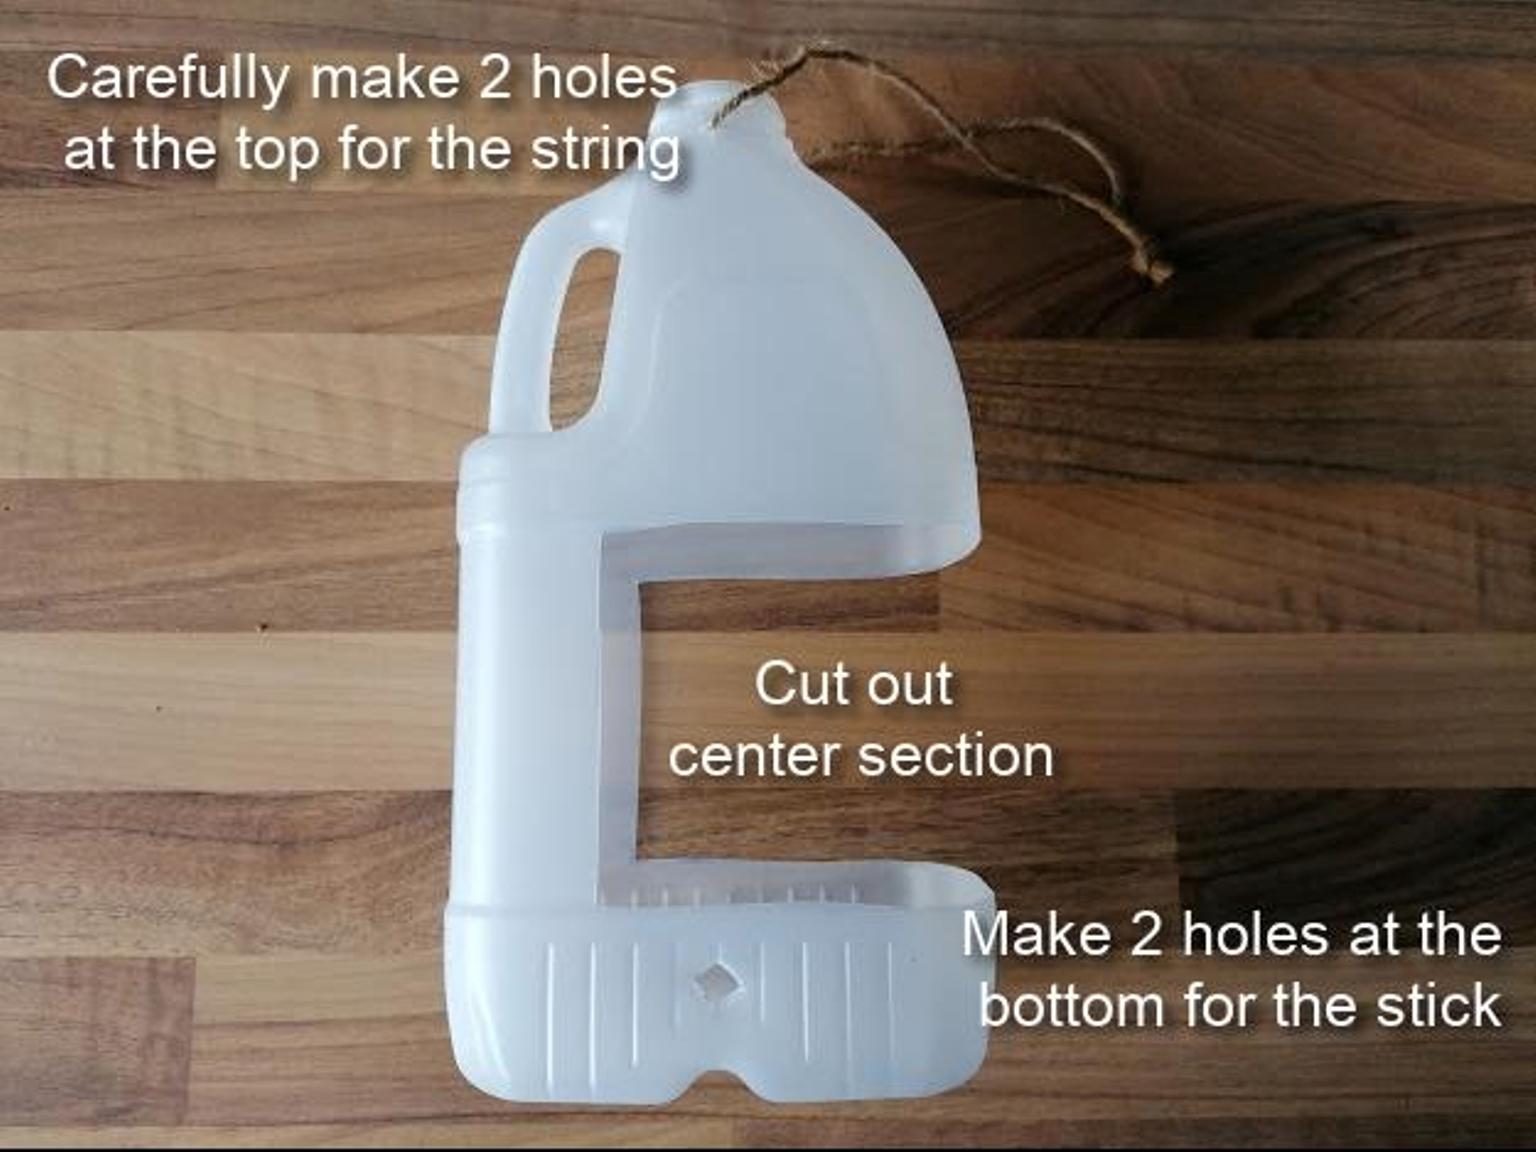
Make 2 holes at the top of the milk carton for the string to go through.
Cut out the centre section.
Make 2 holes on either side of the carton at the bottom for the stick to go through.
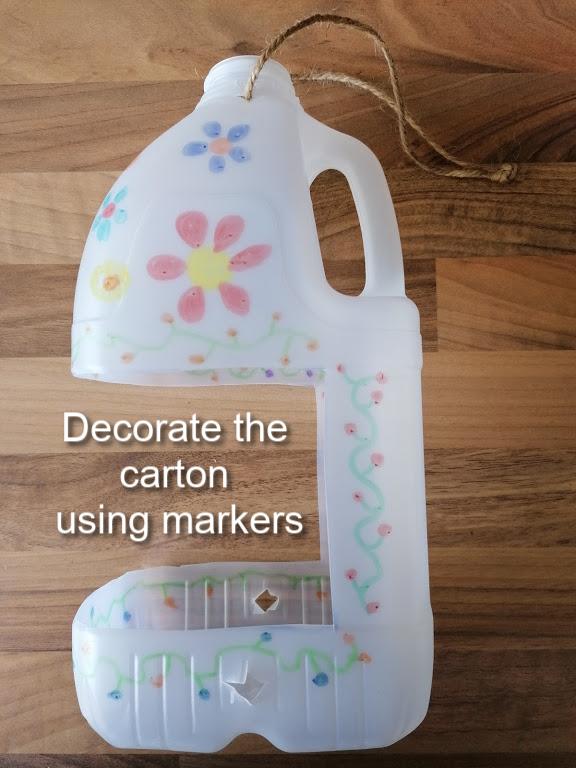
Decorate the carton using markers.
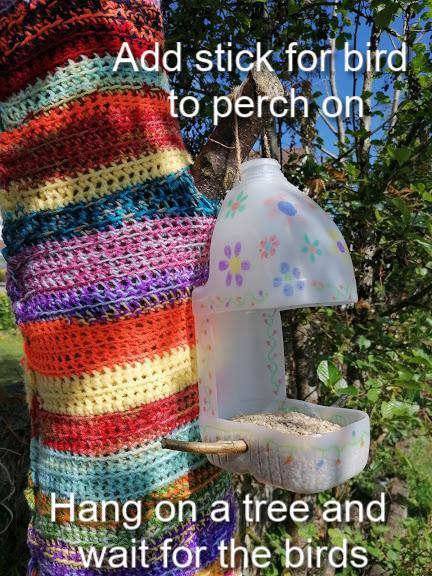
Put the string through the holes at the top and secure it.
Put the stick through the holes at the bottom as a perch for the birds.
Hang the feeder from a branch and fill with seeds for the birds.
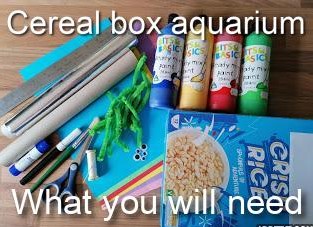
Cereal Box Aquarium
You will need
An empty cereal box, paint, scissors, string, pipe cleaners, glue, coloured paper,
What to do:
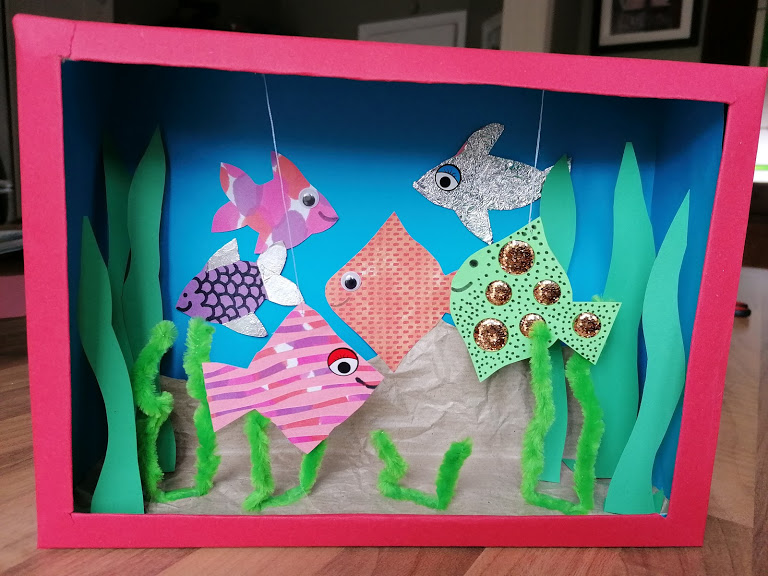
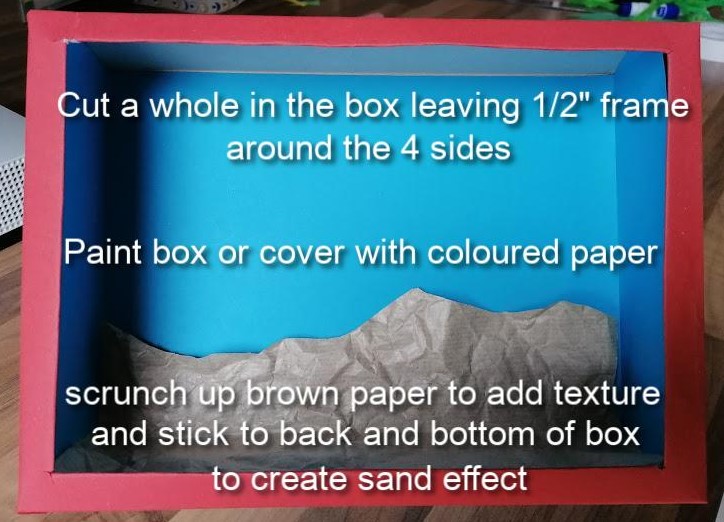
Step 1 : Cut a hole in one side of the cereal box leaving a half inch frame around the edge.
Step 2: Paint the box or cover it with paper. Paint the inside of the box blue or stick on some blue paper.
Step 3: Scrunch up some brown paper and stick it to the back and bottom of the box to add a sand effect.
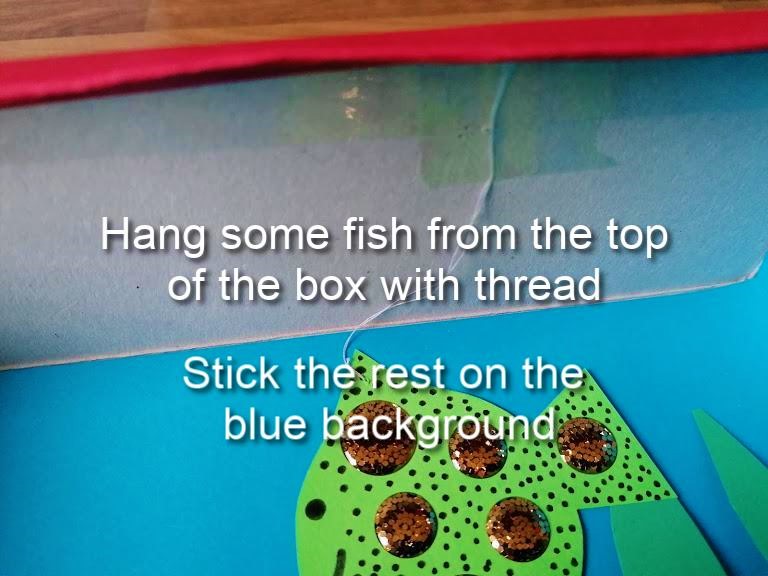
Step 4: Cut out some fish shapes from the coloured paper and decorate it them with sequins, tin foil or glitter. Stick on googly eyes or draw your own and glue them on.
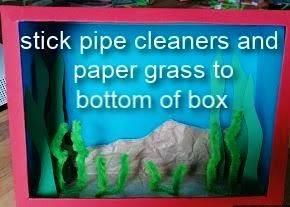
Step 5: Cut out some grass strips from green paper (or colour in your own) and pipe cleaners. Stick the grass to the bottom of the box on the sand.
Step 6: Stick some of the fish on the blue background and hang the rest with the thread.
Step 7: Display with pride.


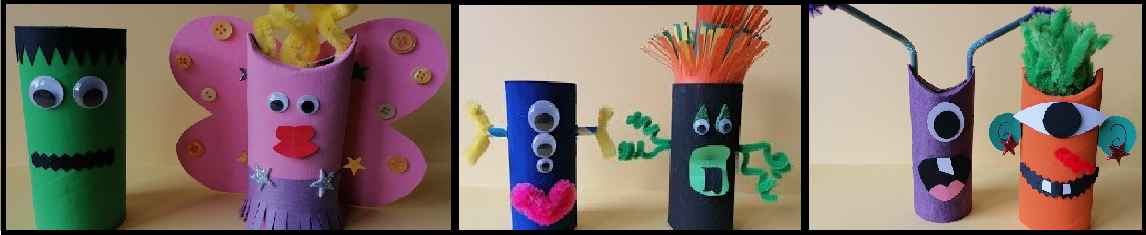
Toilet Roll Monsters
These monsters can be cute or scary - it's up to you. You can make the decorations as crazy as you like.
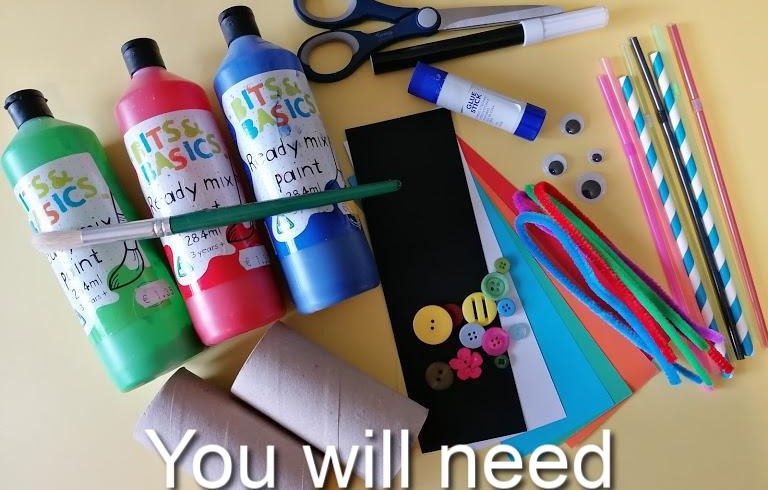
You will need
An empty toilet roll holder, paint, pipe cleaners, glue or pritt stick, a pencil and some coloured paper.
What to do
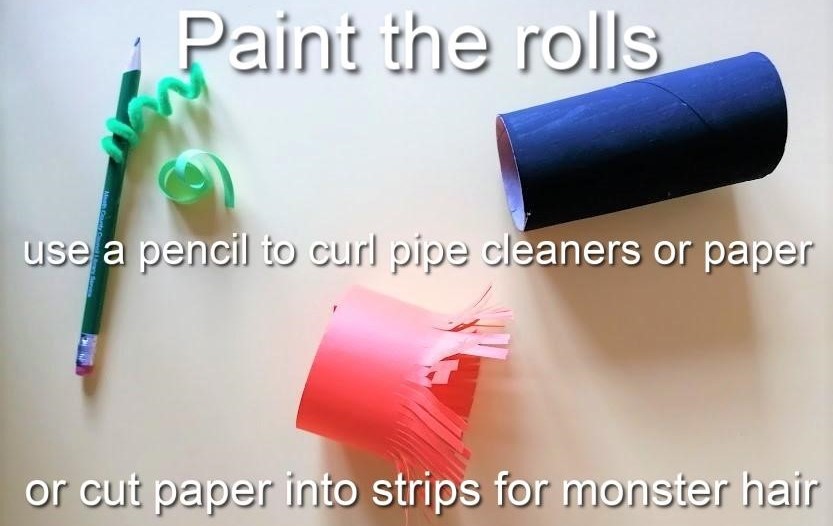
Paint the empty roll.
For the hair and arms you can curl a pipe cleaner around a pencil. Another way to make hair is to use a strip of paper and cut a fringe into one side of it and stick it on to the top of the roll.
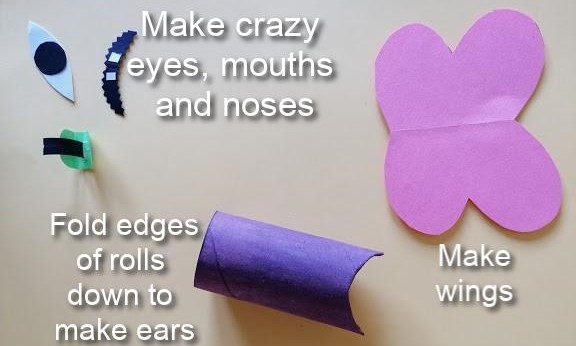
To make ears fold down the top of the roll. Cut out crazy shapes to make features for your monster and stick them on using the glue. Use the pictures above for inspiration or create your own quirky features.
Step 1
Step 2
Step 3
Mosaic Art
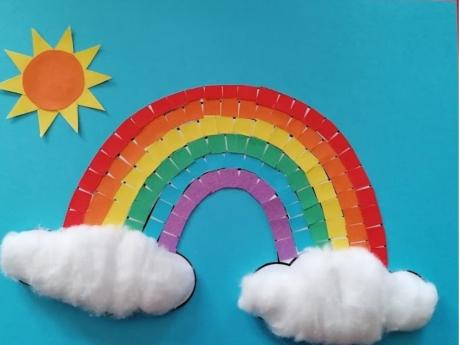
This mosaic rainbow art is easy to do and looks great when finished.
Just follow the steps below to make your own mosaic art.
If you #getcreativeathome and make some we would love to see photos of your finished mosaics.
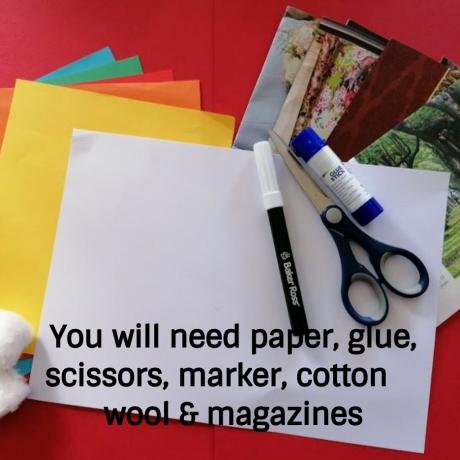
You will need
coloured paper or used magazines.
(Or let your imagination run wild and use tin foil, pompoms or wool.)
a marker
scissors
glue
cotton wool.
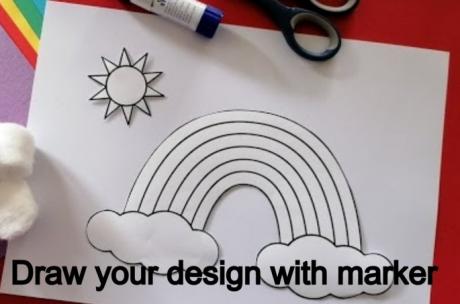
Draw your design on paper with marker.
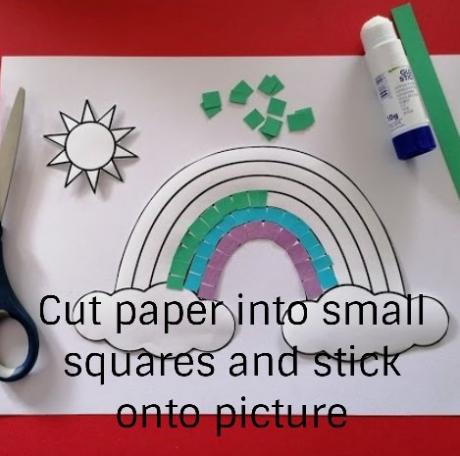
Cut your paper into small square pieces
Stick the squares on to your design to create the mosaic effect.
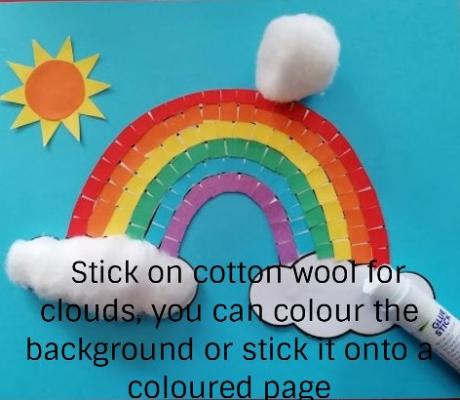
Stick the cotton wool onto the clouds to make them nice and fluffy.
Colour in the background or add in a sun if you like.
Hey presto you have a lovely piece of mosaic art to brighten up your room.
Salt Dough Eggs
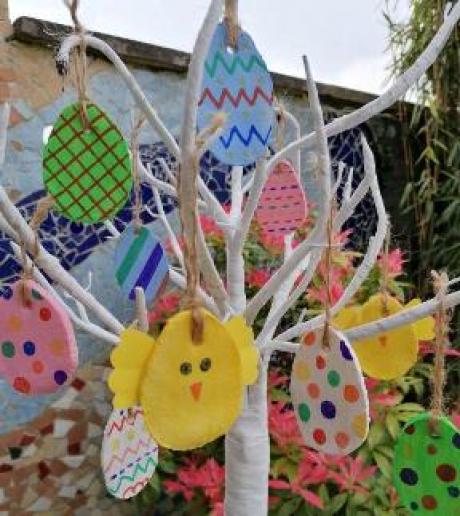
These salt dough eggs are perfect for Easter time but you could make any shapes from the dough using the same techniques.
Why not try making your own animals, fish, stars, flowers - the possibilities are endless.
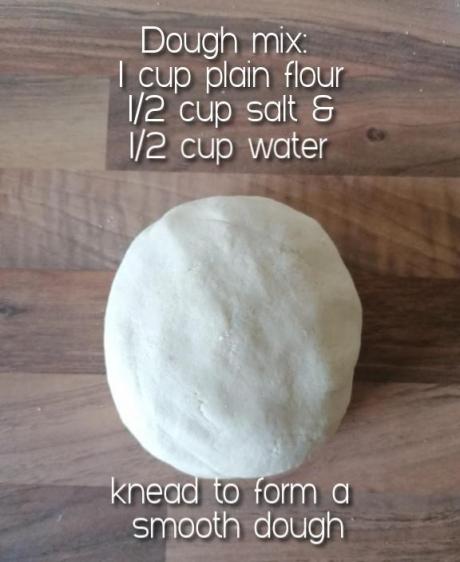
You will need
1 cup plain flour
half a cup of salt
half a cup of water
Mix together the flour and the salt in a bowl. Add in the water slowly until the dough is easy to handle.
Knead it until it is smooth.
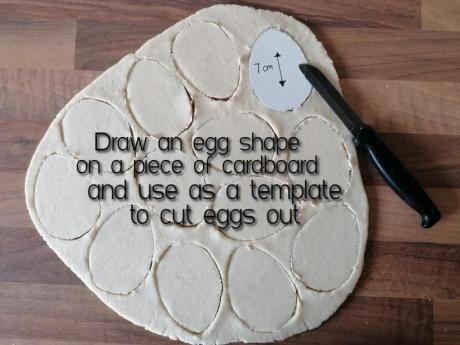
Roll the dough out to about .
Draw an egg shape on cardboard and cut it out.
Use the cardboard egg as a template to cut eggs out of the dough.
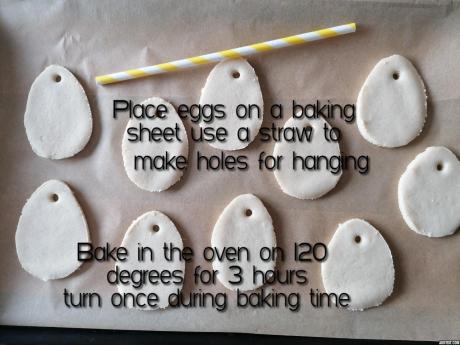
Place the eggs on a baking sheet.
Use a straw to make a hole for hanging at the top of each egg
Bake in the oven at 120 degrees for 3 hours
Turn once during baking.
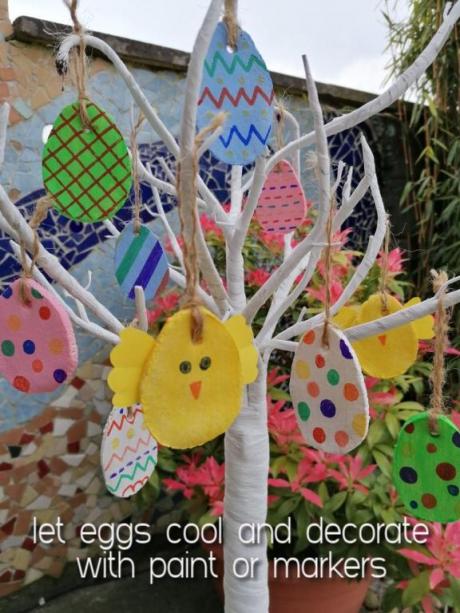
Let the eggs cool.
Paint or colour them with marker.
Use a ribbon or a piece of string to hang them with.
CD Fish
These CD fish are easy to make and are really eye-catching. You can hang them in a window or from the ceiling to decorate your room.

You will need
Old CDs, coloured paper or card, glue (pritt stick is fine), some thread for hanging, 3 pegs, scissors
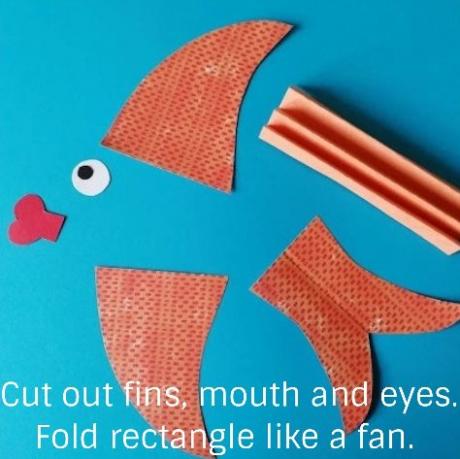
Cut out fin shapes from the coloured paper.
Cut out some eyes and a mouth.You can use googly eyes if you have them. If not you can just draw your own.
Fold a rectangular piece of card like a fan.
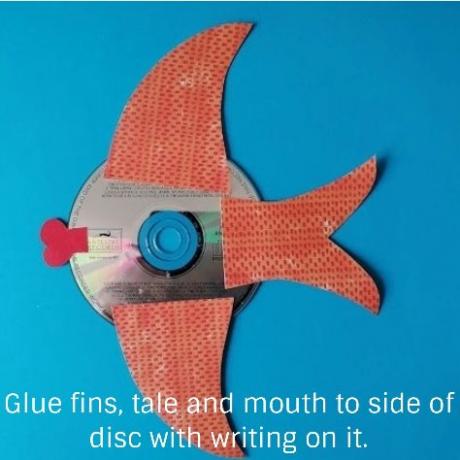
Glue the fins and mouth on to one of the CDs. You could also use double sided sticky tape for this.
Make sure to glue the fins on the side of the CD that has the writing on it.
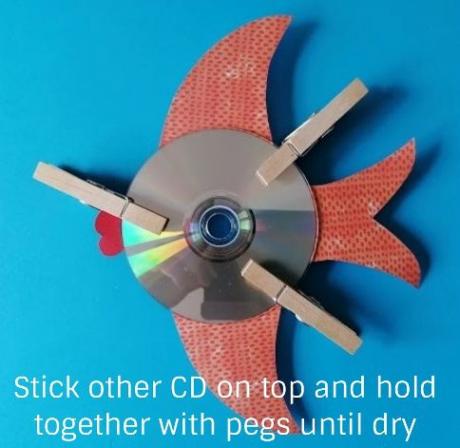
Glue the other CD on top of the first one (writing side face down) and secure it with pegs.
Wait for the glue to dry before you take the pegs off.
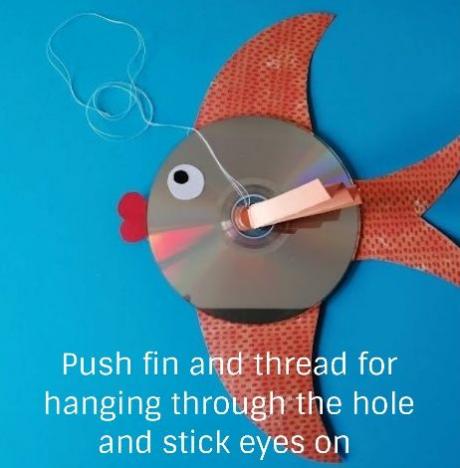
Stick on the eyes.
Push the piece of rectangular paper that you folded into a fan shape through the hole in the middle of the CDs.
Push some thread through the hole to use for hanging up your CD Fish.
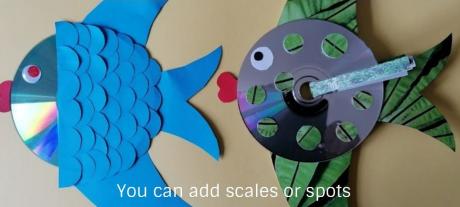
You can decorate the fish in lots of different ways.
Use paper to make scales or spots and stick them on.
© Meath County Council